
How to Identify Vintage Clothing: Reseller’s Guide 2026
You're standing in a thrift aisle with a hanger in one hand and your phone in the other. The print looks right. The fabric feels older. The tag is half gone. You've got maybe thirty seconds before someone else grabs it. The question isn't whether it looks cool. The question is whether it's actually vintage, and whether buying it will make you money.
That's where most resellers lose margin. They either buy on vibes and overpay for old mall-brand clothing, or they pass on real vintage because the usual shortcuts, like checking for a label, don't help. Good sourcing comes from a repeatable process. You need a fast filter for the rack, a deeper method for dating the piece, and a way to decide whether the upside is worth the flaws, cleaning, and listing time.
Table of Contents
- The Difference Between Old Clothes and True Vintage
- The 60-Second In-Store Assessment
- Dating Your Find A Decade-by-Decade Cheat Sheet
- Solving the No-Label Problem How to Date Untagged Finds
- From ID to Profit The Modern Reseller Workflow
- Your Vintage Sourcing Checklist
The Difference Between Old Clothes and True Vintage
A faded floral dress can fool a lot of people. So can a thin tee with a cracked graphic, or a blazer with shoulder pads that scream “older.” Older isn't enough. In resale, vintage has a real definition, and if you don't use it, your buying gets sloppy fast.
Clothing is officially considered vintage only when it falls inside a 20-to-100-year window. As of 2026, that means items from the 1920s through 2006 count as vintage, while anything older than that is considered antique, which is a separate and often less liquid market, as noted in Vogue's explanation of what qualifies as vintage.
That matters because sourcing decisions change once you understand the categories. A piece from the 1990s is comfortably in vintage territory. Something from the early 2000s may qualify on age, but it won't always carry the same buyer demand or pricing power. And if you stumble onto something that's over a century old, you're not dealing with normal vintage resale anymore. You're dealing with antique buyers, slower comps, and a smaller pool of customers.
Practical rule: Don't list something as vintage just because it looks dated. Date it first, then price it.
There's another distinction resellers use in the field. Some buyers reserve true vintage for garments that are much older within that vintage range. That doesn't change the official definition, but it does change buyer behavior. A 1960s dress and a late 1980s dress aren't treated the same, even if both are technically vintage.
That's why learning how to identify vintage clothing isn't about trivia. It protects your buy cost, helps you write stronger listings, and keeps you from wasting time on pieces that are only “old enough” on paper.
The 60-Second In-Store Assessment
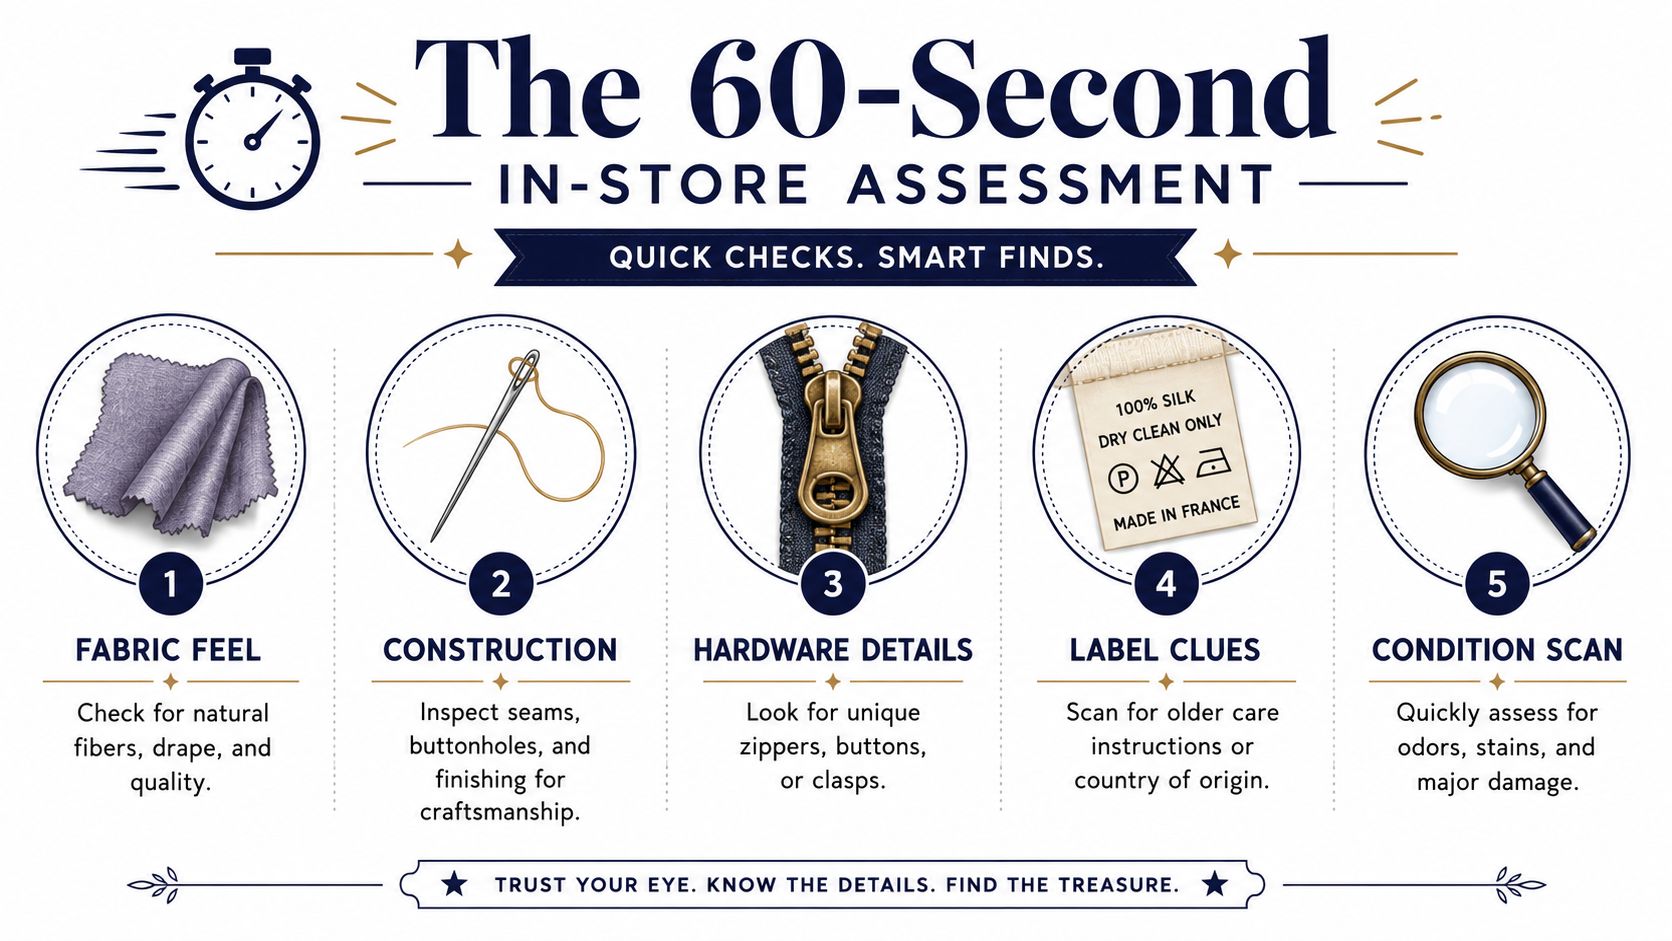
Speed matters at the rack. You don't need a museum-grade evaluation while someone is reaching over your shoulder. You need a quick screen that tells you whether a piece deserves more attention.
A proven method uses four checks: labels, construction, materials, and design details. According to My Vintage's authentication guide, examining labels for RN numbers, fabric content, and location, inspecting construction for single-stitching or French seams, analyzing materials like metal zippers, and cross-referencing design with era-specific styles creates a high-accuracy way to identify vintage.
Start with the tag, but don't stop there
The label is your fastest clue, not your final answer.
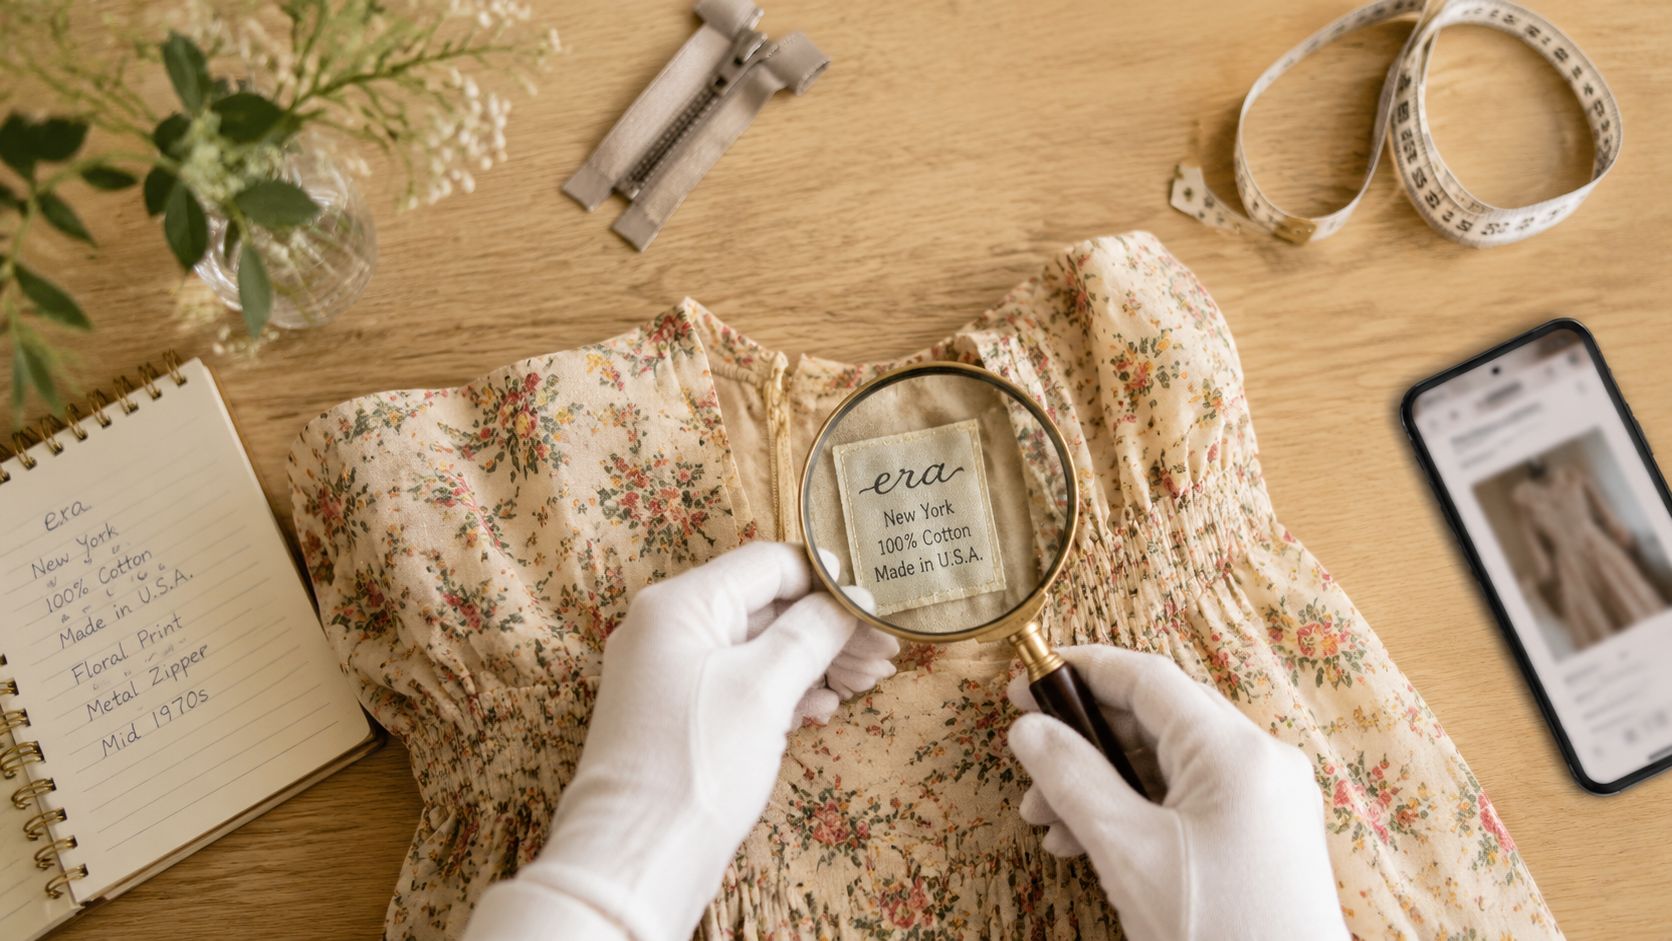
- Read the basics first. Brand name, country of origin, fabric content, care language, and RN numbers can narrow the age fast.
- Look at typography. Older tags often have a different graphic feel than modern reproductions. Fonts, spacing, and woven label quality can be revealing.
- Watch for false confidence. “Made in USA” can help, but it doesn't automatically mean vintage.
If the tag looks promising, flip immediately to the inside seams and hem. That's where weak fakes and newer garments usually give themselves away.
Use touch and hardware to confirm the story
Fabric feel is one of the fastest filters in the store. Older garments often have a different hand feel than modern fast fashion. Some feel denser, others drape better, and older synthetics often have a very distinct texture.
Then check the hardware.
| Area | Fast clue | Why it matters |
|---|---|---|
| Zipper | Metal zipper can suggest older construction | It supports an earlier production era |
| Hem | Single-stitching can point older on tees | It's a strong clue when the rest matches |
| Seams | French seams or cleaner finishing can signal quality | Better construction often tracks with older garments |
| Buttons and clasps | Unique hardware shapes or wear patterns | They help confirm period consistency |
A good in-store habit is to build from fastest to slowest. Tag. Hem. Side seam. Zipper. Overall shape. If two or three of those line up, keep digging.
If one clue says vintage and three clues say modern, trust the three.
For quick digital backup while you're still sourcing, tools in the resale space can help you compare what you're seeing against recognized item details. If you want a broader look at image-based product recognition, this guide to item identifier apps gives useful context on how sellers use them in the field.
Know when to stop digging
Not every maybe deserves five more minutes. Some pieces fail fast.
- Pass on obvious modern construction unless the brand or style has unusual demand.
- Be careful with costume-y reproductions that mimic older silhouettes but use modern sewing and cheap fabric.
- Don't ignore condition on thin margins. A promising era doesn't rescue bad odor, heavy staining, or major fabric weakness.
The goal of the sixty-second check isn't perfect dating. It's triage. You're trying to separate likely vintage from time-wasting noise before you spend more attention.
Dating Your Find A Decade-by-Decade Cheat Sheet
Once a piece survives the first pass, the next job is narrowing the era. At this stage, good resellers stop sounding vague in their listings. “Vintage style” doesn't sell like “late 1970s polyester disco blouse” or “early 1990s single-stitch graphic tee.” Buyers pay more when the garment has a believable timeline.
What the garment is telling you
Start with the parts that are hardest to fake accidentally. Closure type. Seam finishing. Fabric content. Silhouette. Those tend to age together. If the shape says 1980s but the inside construction looks far newer, something's off.
Union labels can help too. In practice, many resellers use them as a narrowing tool, not as standalone proof. The same goes for RN numbers and older manufacturing details. The strongest dating comes from stacking clues until the garment tells one coherent story.
Here's the shortcut. Don't ask, “What decade does this remind me of?” Ask, “What decade do the construction and design both support?”
Quick decade cues that actually help
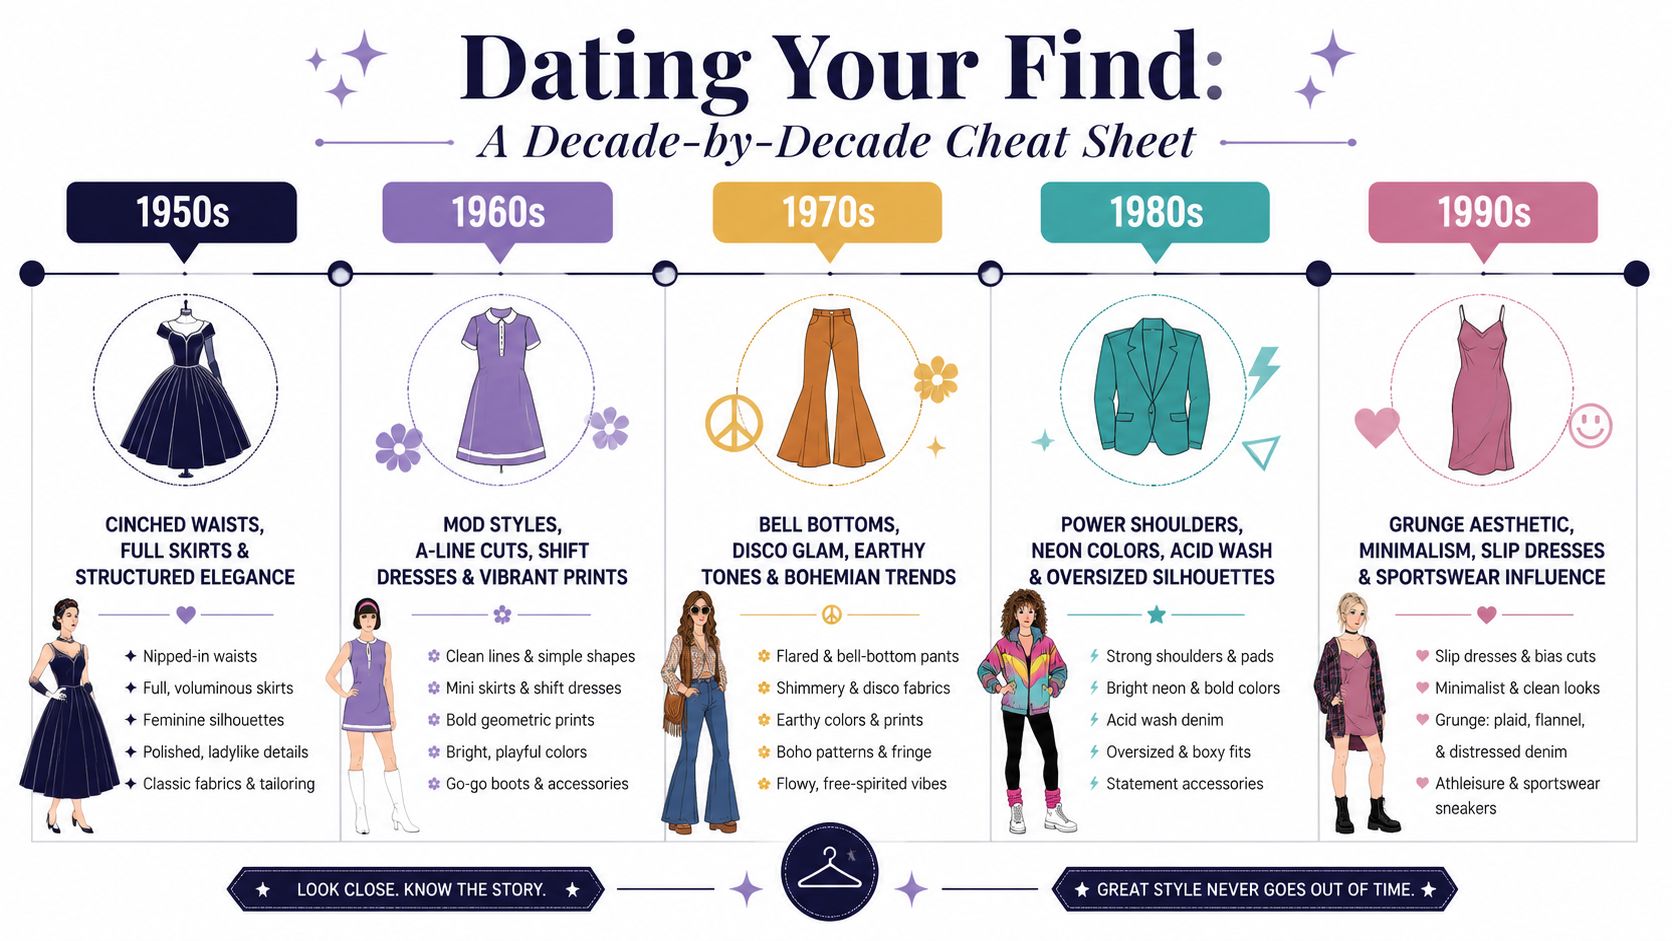
Below is the kind of cheat sheet that works on a rack. Not every garment will fit cleanly into one decade, but these clues can move you in the right direction.
1950s and earlier
Think structure first. More shaping, more defined lines, and often more labor in the finish. You may see metal zippers, older seam finishes, and construction details that feel less mass-produced than later pieces.
For dresses and blouses, watch for smaller waists, fuller skirts, and details that feel built rather than printed on. On workwear or homemade garments, internal construction can matter more than style because the silhouette may be plain.
1960s
Shape gets cleaner and more graphic, with shift dresses, A-line cuts, mod styling, and sharper visual simplicity showing up often. Hardware and label details still matter, but the overall line of the piece can be a strong clue.
A 1960s piece often feels intentional in its shape. It usually doesn't have the exaggerated volume of the 1980s or the earthier looseness you'd expect later in the 1970s.
1970s
This decade is easier to spot once you've handled enough pieces. Polyester becomes common, prints get louder, and silhouettes loosen up or stretch out. Bell sleeves, disco influence, earthy palettes, and bohemian details all show up in different corners of the decade.
- Tops and dresses often lean into fluid movement, bolder prints, or synthetic shine.
- Pants may widen through the leg.
- Labels can start feeling more commercial and mass-market than earlier eras.
If the garment has swagger and a little weirdness, the 1970s is often worth considering.
1980s
The 1980s usually announce themselves. Strong shoulders, oversized cuts, bold graphics, acid wash, shiny fabrics, and obvious volume all live here. You'll also see more garments where the silhouette is the dating clue before anything else.
That said, don't let shoulder pads make the call alone. Pads were added, removed, and reused across decades. Check the label and inside work so you don't mistake a later retro revival for an authentic piece.
1990s
The 1990s split into a few lanes. Grunge, minimalism, mall casual, sportswear, and early streetwear can all show up. This is also where many resellers rely heavily on single-stitch tees, older denim feel, and graphic style to narrow the range.
The trick is separating strong 1990s pieces from early 2000s items that look close at first glance. Fabric weight, printing style, label design, and overall cut usually decide it.
Good decade dating is cumulative. One clue starts the case. Four clues close it.
Use design references without getting lost
Cross-referencing is useful when you've got a likely era but need more confidence. Pattern books, label archives, and period fashion references can help you avoid lazy guesses. Use them to confirm what the garment is already suggesting, not to force a match.
The biggest mistake here is over-romantic dating. Sellers see one old-looking feature and leap backward a decade or two. Buyers who know vintage can spot that immediately. It's better to say “likely late 1980s to early 1990s” than to force a precise claim the garment doesn't support.
Solving the No-Label Problem How to Date Untagged Finds
A lot of valuable vintage has no label at all. That's where newer resellers freeze, because most beginner advice starts and ends with tags. In real sourcing, some of the best pieces are missing the very thing people were taught to rely on.
A significant volume of valuable vintage clothing, especially pre-1950s workwear or homemade items, lacks labels, and resellers often lose profit by misidentifying those pieces. The ability to date clothing through construction details alone, including single-stitching common on pre-1990s tees, is a major advantage, as discussed in this reseller discussion on untagged vintage identification.
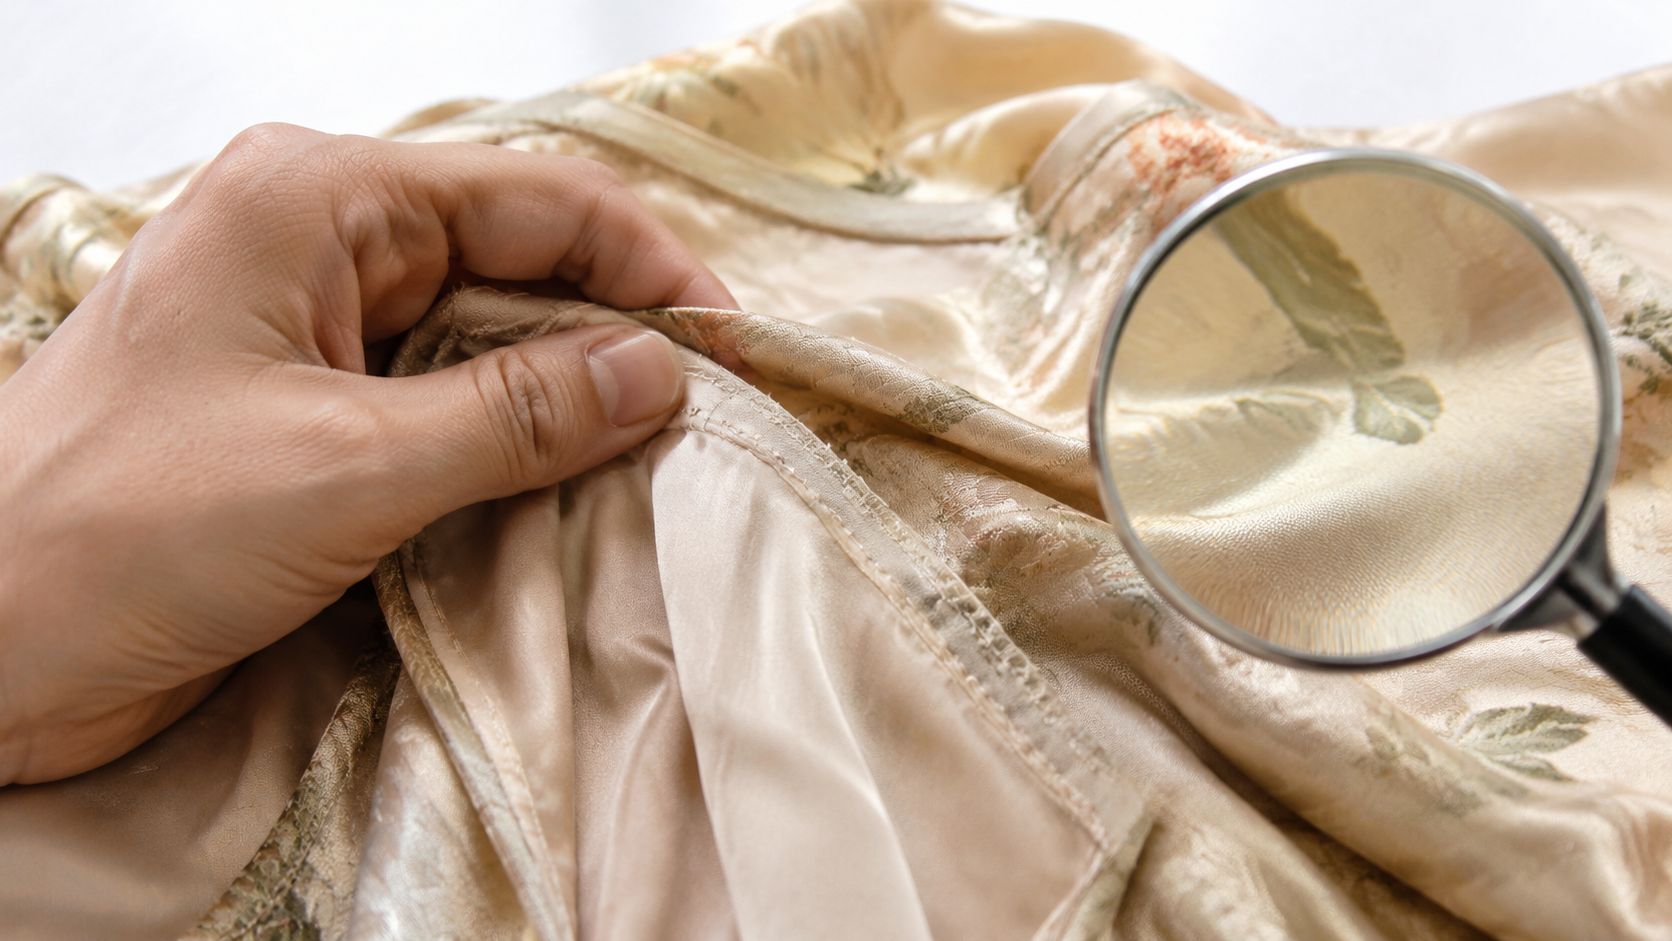
Construction first, labels second
If there's no tag, the garment itself becomes the evidence. That's not a disadvantage if you know what to inspect.
Start at the seams. Look at hem finishing, cuff stitching, side seam construction, and how the garment was assembled. On tees, single-stitch details can be a strong clue. On older handmade or workwear pieces, unfinished seams or pinked edges can tell you more than any missing brand tag ever could.
This is one reason experienced resellers handle the inside of garments almost as much as the outside. Buyers shop the front. Sourcers profit from the back end.
What to inspect on untagged pieces
Here's the checklist that matters most when labels are gone:
- Hem style. Single-stitch hems on tees can support an older production window when the fabric, graphic, and cut agree.
- Seam finishing. Unfinished seams can point older, especially on garments made before modern mass-production became standard.
- Fabric weight. Older denim, tees, and workwear often feel different in the hand. Not always heavier, but usually less slick and less uniform.
- Thread and wear pattern. True age tends to wear naturally at stress points. Fake aging often looks too even or too theatrical.
- Closure consistency. Buttons, zipper type, and attachment method should make sense with the rest of the garment.
A no-label piece needs more agreement between clues than a tagged piece does. If the construction says older but the cut feels obviously modern, don't force the buy.
Some of the best vintage in the room is the piece everyone else skipped because they wanted a clean tag.
When untagged is a buy
Untagged doesn't mean risky by default. It means you need a cleaner threshold.
Buy when the garment has a strong combination of older construction, convincing fabric, and a silhouette buyers want. Pass when the evidence is thin and the condition is rough enough to create listing headaches. A missing label is manageable. A missing label plus uncertain era plus damage usually isn't.
This is also where experience compounds. The more untagged pieces you handle, the faster your eye gets. You stop treating no-label garments like mysteries and start treating them like puzzles with visible edges.
From ID to Profit The Modern Reseller Workflow
Identification is only half the job. Plenty of genuine vintage still makes a bad flip. The piece may be authentic, but the demand may be weak, the flaws may be expensive to disclose, or the sale price may not leave enough after shipping and fees.
Build a buy or pass routine
A clean workflow keeps emotion out of the cart. Mine looks like this:
- Spot the candidate using the fast checks. Tag, seams, hardware, fabric, shape.
- Confirm the era range well enough to describe the piece accurately.
- Inspect condition hard. Underarm wear, missing buttons, zipper function, dry rot risk, staining, alterations, and odor matter more than optimism.
- Estimate buyer appeal. Is this collectible, wearable, or just old?
- Check resale math before committing.
That fifth step is where a lot of profits disappear. Sellers know how to identify vintage clothing, but they still buy pieces with no room after platform fees, shipping, and returns risk.
Value isn't the same as profit
A garment can have strong sold listings and still be a bad pickup for you. Condition changes everything. So does the platform. So does the amount of work needed to clean, photograph, measure, and explain flaws.
This is why pricing guides need to focus on take-home, not just headline sale price. If you're tightening your process, this breakdown of how to price items for resale is a useful companion to the identification side of sourcing.
Here's a simple decision table that keeps things practical:
| Situation | What it usually means |
|---|---|
| Great era, weak condition | Only worth it if demand is strong and flaws are acceptable to buyers |
| Good condition, vague era | Safer if style is wearable, but don't overclaim vintage status |
| Strong era, strong construction, no-label | Often worth deeper research because others may miss it |
| Cool piece, low demand comps | Leave it unless your buy cost is very forgiving |
Don't let research kill speed
A lot of resellers know the clues but still hesitate too long. They open multiple apps, search slightly different keywords, compare the wrong items, then lose the piece or burn too much time on one maybe.
A faster sourcing routine uses image-based identification, sold comparables across marketplaces, and fee-aware profit checks in one pass. That's especially useful with vintage, because many pieces don't have barcodes and some don't have usable tags. A visual-first workflow fits the reality of thrift stores better than manual lookup alone.

The goal isn't to replace your eye. It's to support it. Your knowledge gets you to the right rack and the right garment. A faster research system helps you verify whether that garment is a flip, a hold, or a pass before you talk yourself into a bad buy.
Your Vintage Sourcing Checklist
Use this as your mental script the next time you're in a thrift store, estate sale, or flea market.
Rack check
- Age threshold first. If it doesn't plausibly fit the vintage window, don't waste energy trying to force it.
- Tag glance. Brand, fabric content, RN details, country, care style.
- Construction check. Hem, side seams, cuffs, seam finishing.
- Hardware pass. Zipper type, buttons, clasps, snaps.
Dating check
- Silhouette match. Does the shape line up with the era you suspect?
- Fabric agreement. Does the material support that era, or fight it?
- Detail consistency. Label, closure, construction, and design should tell the same story.
- No-label logic. If the tag is missing, rely on sewing, fabric feel, and finishing.
Profit check
- Condition reality. Be honest about flaws, labor, and buyer tolerance.
- Demand check. Cool doesn't always equal sellable.
- Net profit focus. Sold price matters less than what you keep.
- Speed rule. If you're drowning in uncertainty, move on unless the buy cost is low enough to justify the risk.
For sellers who want a tighter sourcing loop from first glance to final buy decision, this scan-to-buy workflow for resellers shows how to cut the lag between finding a piece and deciding whether it's worth taking home.
The whole game is simple to say and harder to do. Learn the clues. Trust construction more than hype. Don't depend on labels. And make sure the numbers work before nostalgia talks you into inventory you'll regret.
If you want a faster way to validate vintage finds in the aisle, ScanFlip AI helps resellers identify items from photos, review sold comps across major marketplaces, and estimate net profit after fees and shipping. It's built for the exact moment when you need to decide whether a piece is a flip or a pass.